Cabinet Measurements
Understanding cabinet measurements can be confusing, well we have made it easy just for you.
Handy Hints
Handy hints to get you start with your cabinet measurements.
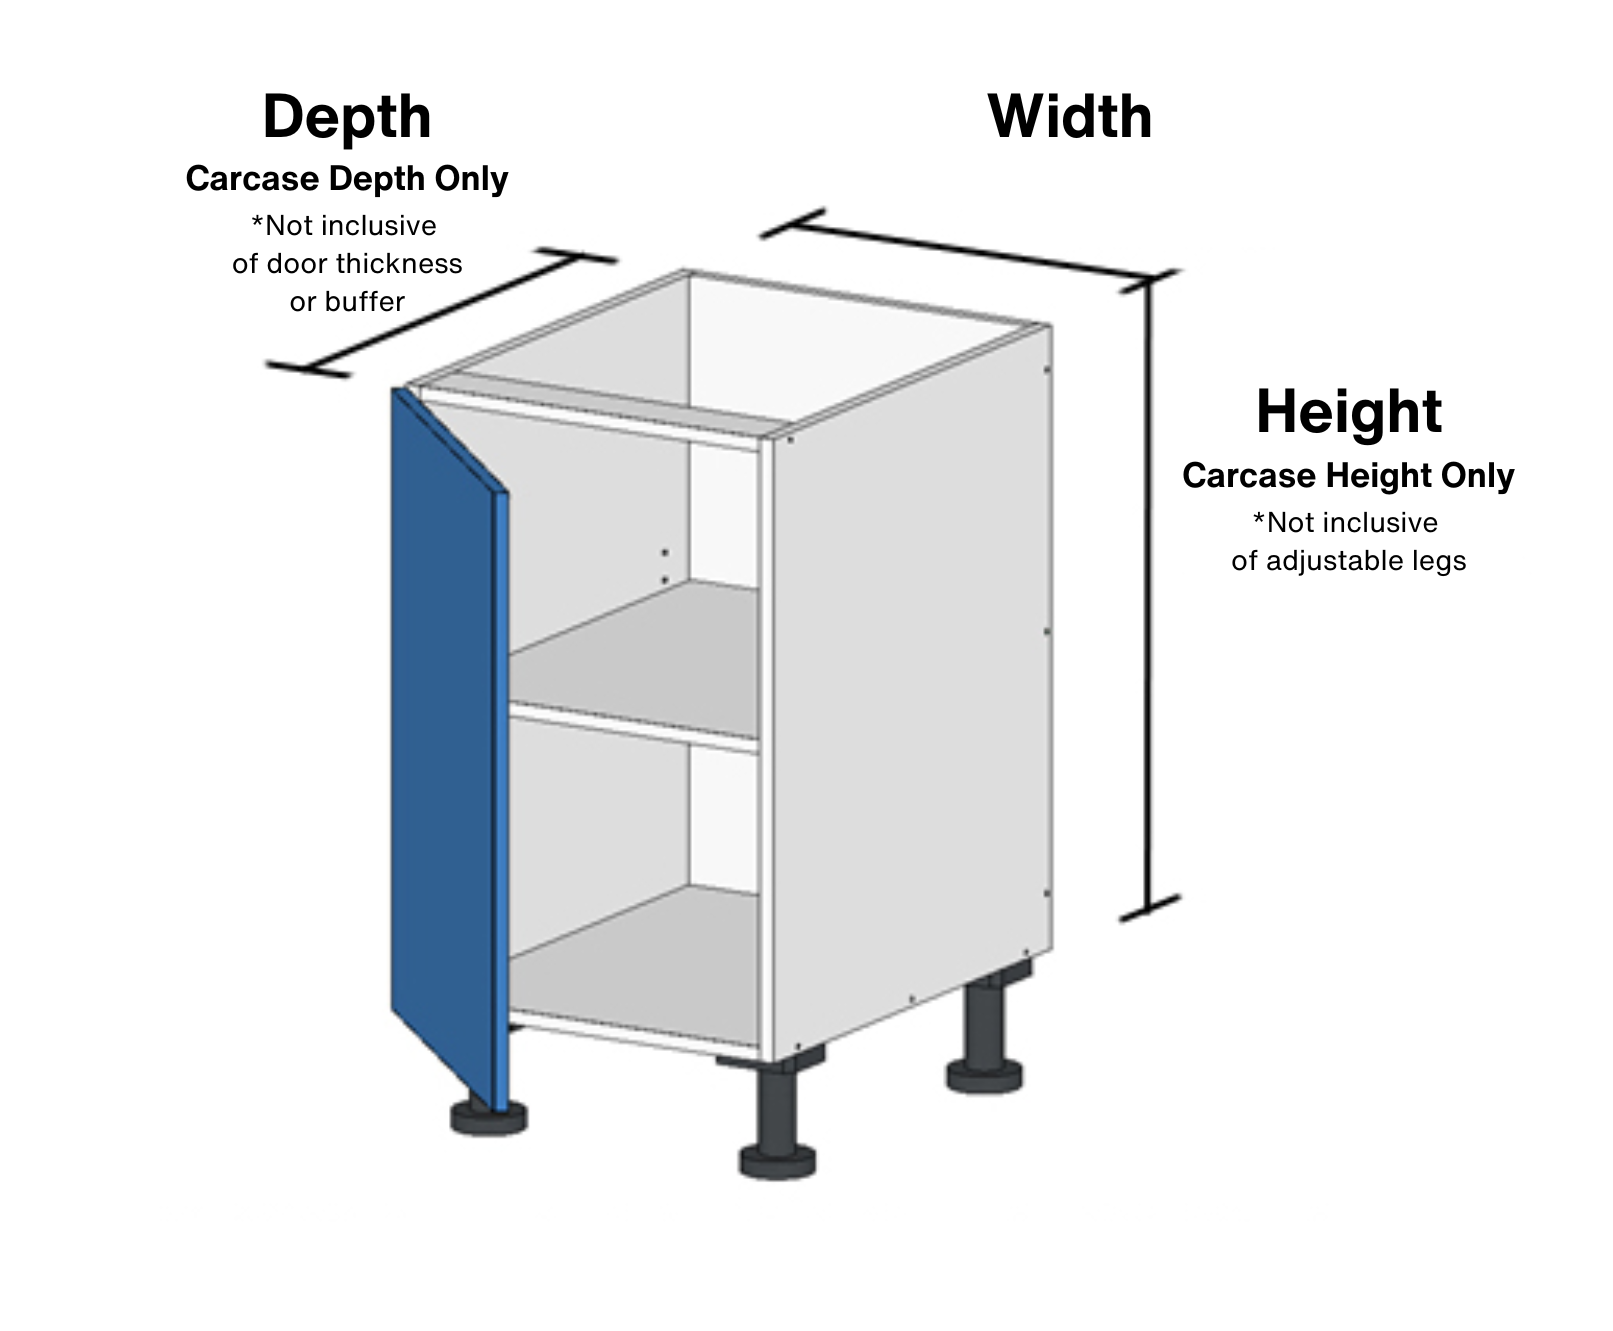
The depth of the cabinetry is based on the cabinet carcase and does NOT include the door thickness or buffer.
The adjustable legs on base and tall units are NOT included in the overall height.
Our adjustable legs allow for variable height from 90mm to 170mm
Ready to begin ordering?
To begin ordering your flat packs you first need to register.
Key Measurements
Depth Considerations
The depth measurement in the app refers to the distance in mm from the back of the cabinet to the front of the carcase.
Why does this mean?
Overall depth in relation to benchtops needs to be considered. A 580mm cabinet depth on a 600mm deep benchtop would leave a 20mm overhang.
In this platform, you’d need to order your cabinets at ~560mm (depending on the thickness of the door material and your estimated door buffer).
For instance, if you have a cabinet with a depth of 580mm under a 600mm benchtop, this will create a 20mm overhang. To accommodate for this, you should reduce the cabinet depth while accounting for the door thickness and a buffer. If the door thickness is 16.5mm and you include a 2mm buffer, you would set the cabinet depth to 561.5mm.
When ordering Applied Panels (End Panels), if you’re covering the whole cabinet carcase plus the door, your panel depth should be inclusive of carcase depth + door material thickness + a small buffer. It can also be good to oversize your end panels and plane them down to size.
Height Considerations
The height measurement within the app refers to the distance in mm from the bottom of the cabinet carcase to the top of the cabinet carcase.
This is not inclusive of the height of legs/kicker.
Door / Drawer Gaps and Margins
Door and drawer margins and gaps can be confusing at times. Below is an explanation of each of them and how they might be used in your job.
Door Gaps
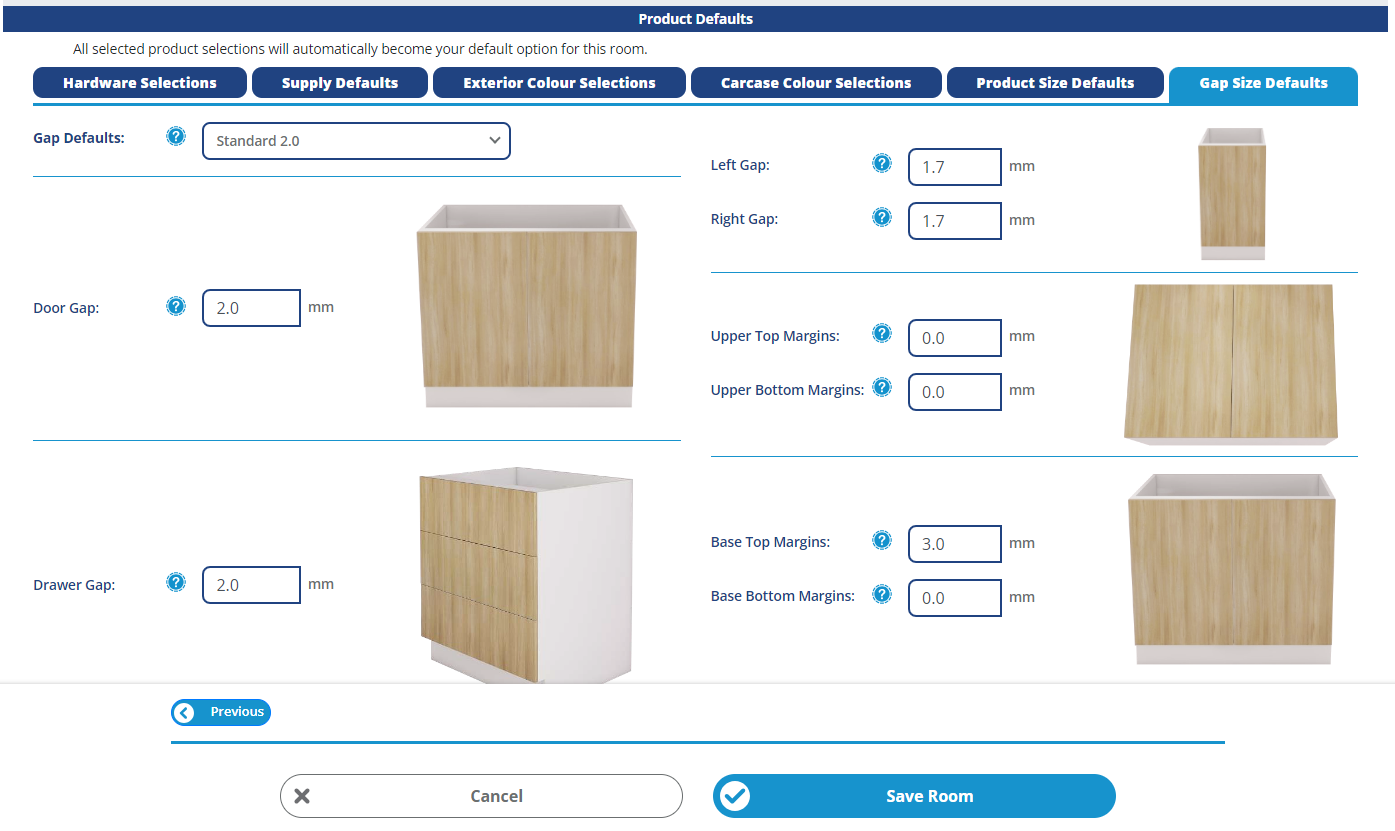
The door gap refers to the space between the pair of doors on a single cabinet. Door gaps ensure that your doors open and close nicely without jamming together.
Drawer Gaps
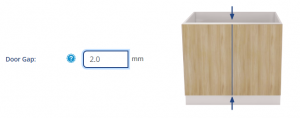
Similarly, the drawer gap refers to the space between drawer fronts on a single cabinet. Drawer gaps ensure that your drawers open and close nicely without jamming together.
Upper Top and Bottom Margin
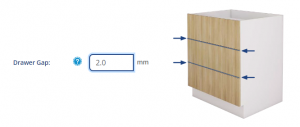
The upper top and upper bottom margins refer to margins on the doors of your upper cabinets.
If a cornice/applied panel is sitting flush with the top of your cabinet, you may need to alter the upper top margin.
For example, you would enter in “2.0” into you upper top margin field to allow a 2mm gap between the top of your upper cabinet door and the cornice/applied panel.

Similarly, If you have an applied panel covering the bottom panel of your upper cabinet, you can use the upper bottom margin to allow for a clearance between your upper cabinet door and your applied panel.
The upper bottom margin can also be used to create finger pulls on the bottom of your upper cabinet doors by extending the door panel down past the bottom of the cabinet carcase.
To create this simply enter in “-20” for example, to extend your doors on your upper cabinets down 20mm past your cabinet carcase. It is important to use the minus sign when you are wanting your margins to extend panels beyond the cabinet carcase.

Base Top and Bottom Margins
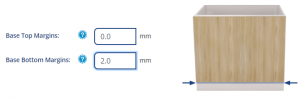
Base top and base bottom margins refer to margins on the doors/drawers of your base cabinets.
You may need to alter the base top margin to allow for a benchtop which is sitting flush with the top of your cabinet. For example, you would enter in “2” into you base top margin field to allow a 2mm gap between the top of your base cabinet door and your benchtop.
If you were, for example, to want to extend your door down to the floor, you can enter a negative number into the base bottom margin to increase the length of your door. E.g. entering “-145” would drop your door down an additional 145mm past the cabinet carcase.

Left and Right Gaps
The left and right gap refers to the outer left and right side of the doors/drawers on your cabinets. There needs to be a ‘gap’ or space, so that when your cabinets are connected together, they do not rub with the door/drawers on the cabinet beside it.
If set to “2.0” for example, it will provide a 2.0mm gap on both the left and right side of your door/drawer on each cabinet. When your cabinets are installed and connected together, this will add up to a 4.0mm gap between doors/drawers on your cabinets.


