
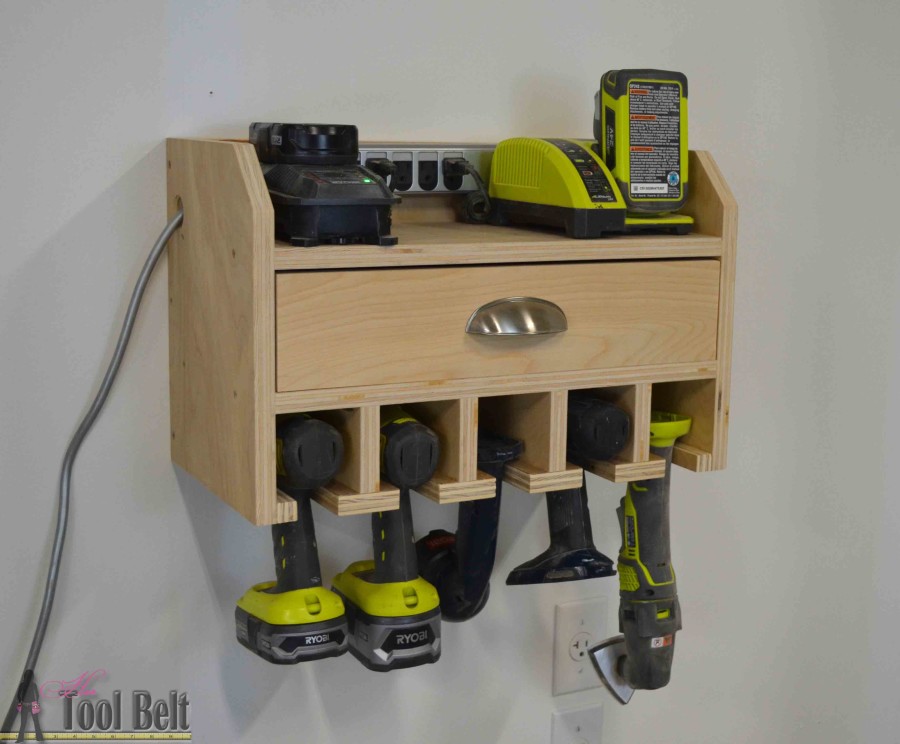
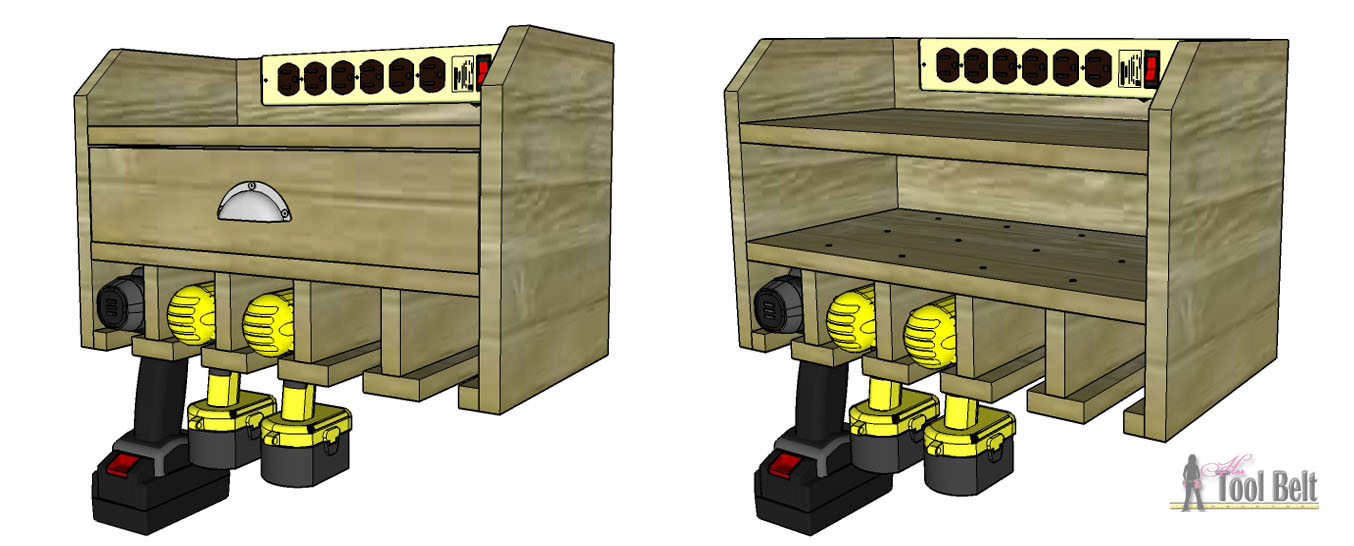
What a great idea to corral your drills, batteries, and battery chargers in one place. I thought it would be handy to include a drawer for drill bits too.
How to Build a Cordless Drill Organizer and Battery Charging Station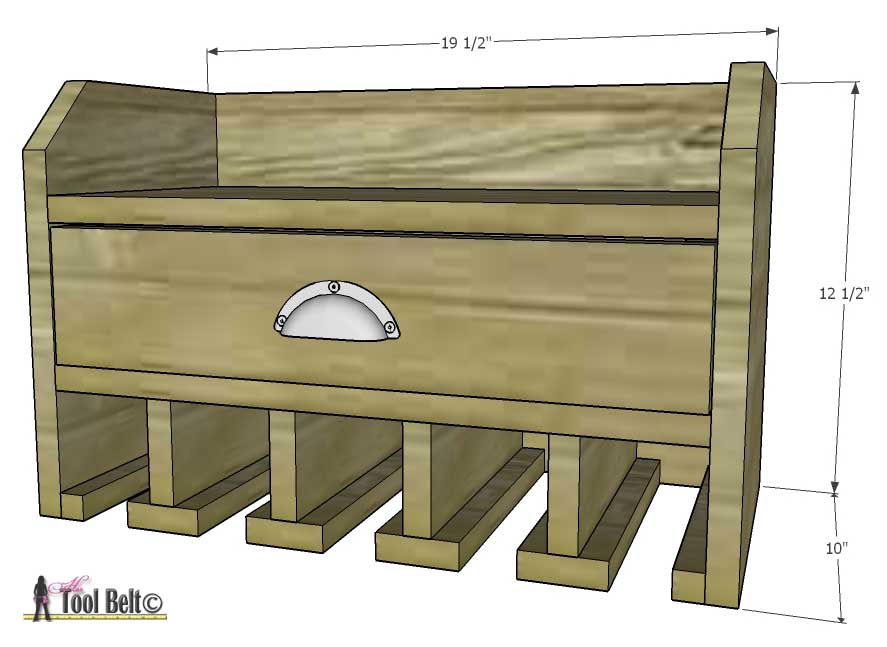
Materials
- 3/4″ plywood (1/2 sheet 4’x4′) *can be substituted with 3/4″ wood
- 1/4″ or 5 mm plywood
- 1 1/4″ screws
- wood glue
- sandpaper
- 3″ screws
- drawer pull
Cut List
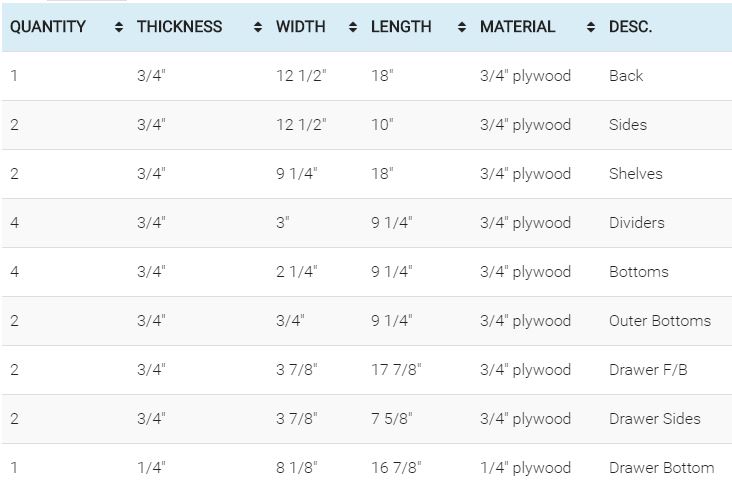
*Note: This organizer fit perfectly with my Ryobi drills (old and new). If the top of the handle, just under the head of your drill is larger than 1 1/2″, adjust the width of the bottoms (2 1/4″) accordingly.
Step 1
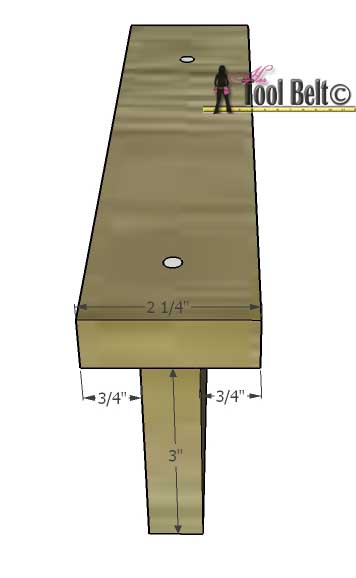
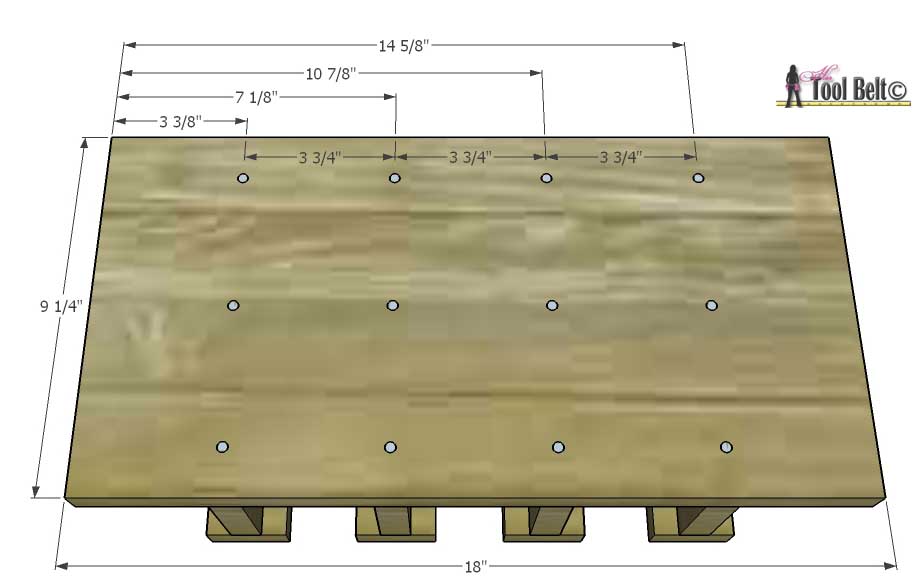
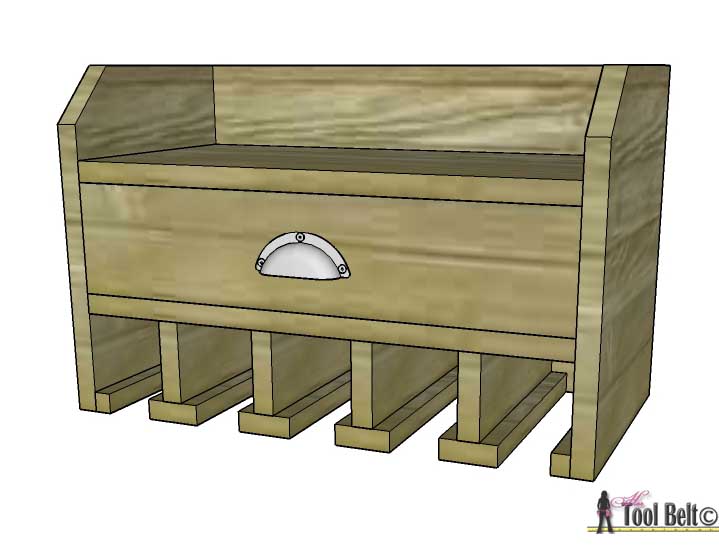
Cut out all pieces according to the cut list. Get the 4 dividers and bottoms. Mark 3/4″ in from each side of the bottom, to center the divider. Pre-drill the bottom piece, unless you are using self tapping screws. Apply a bead of glue and secure each divider and bottom together with 1 1/4″ screws.
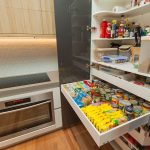
Take one of the shelves. Mark and pre-drill holes to attach the dividers to the shelf. Glue and attach the dividers to the shelf with 1 1/4″, make sure the screws are flush or lower with the wood surface. The gap between each divider is 3″.
Step 2
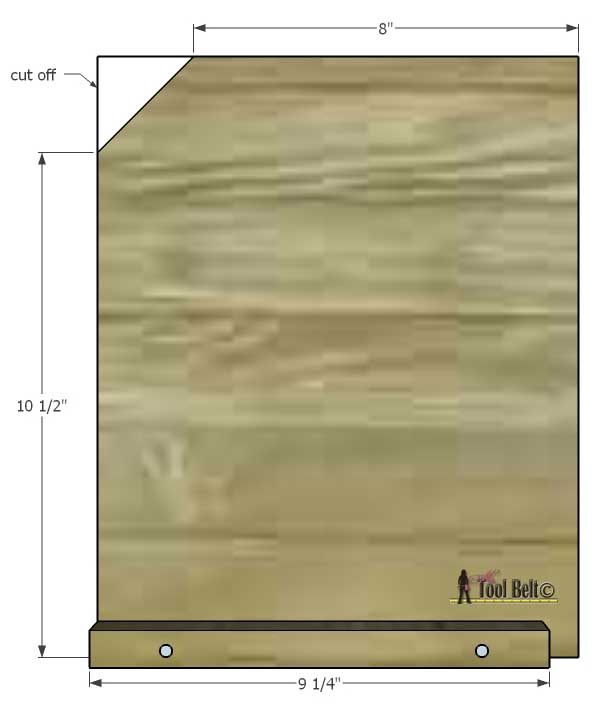
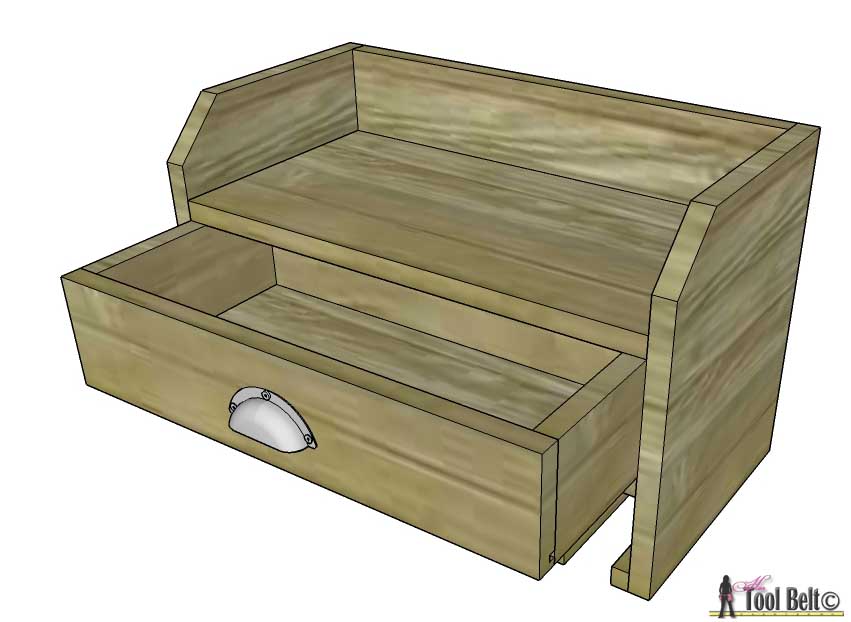
On the 2 sides, measure over and mark 8″ and measure up 10 1/2″ and mark. Cut between the marks, removing the excess triangle. Attach with glue and screws, the bottom side piece at the bottom inside of each side, flush with the front and bottom.
On the sides measure up and mark 4 1/2″ and 9 1/4″ from the bottom. The gap between the shelves is 4″. Pre-drill the sides, glue and screw the shelves between the sides.
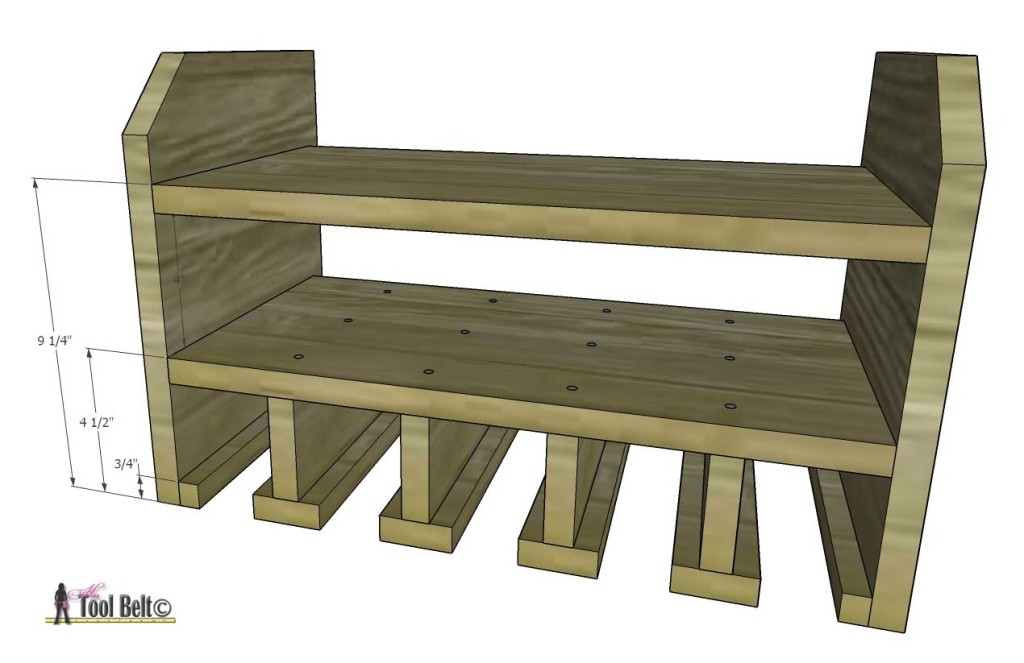
Attach the back, between the sides. Secure with glue and screws.
Step 3
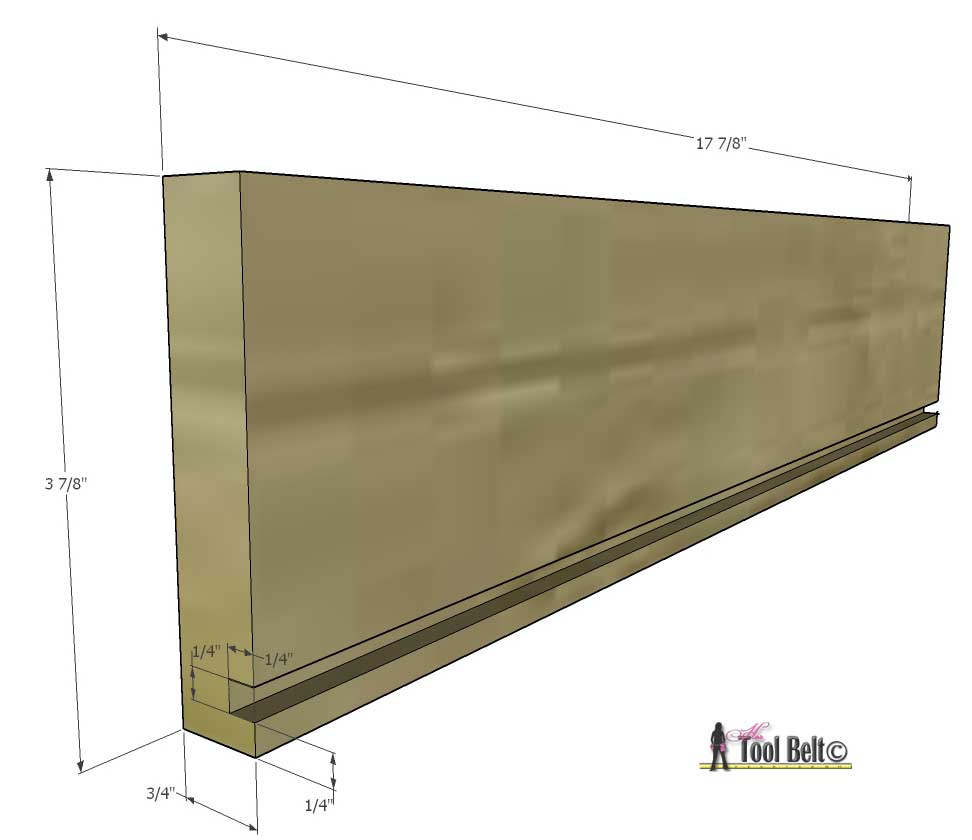
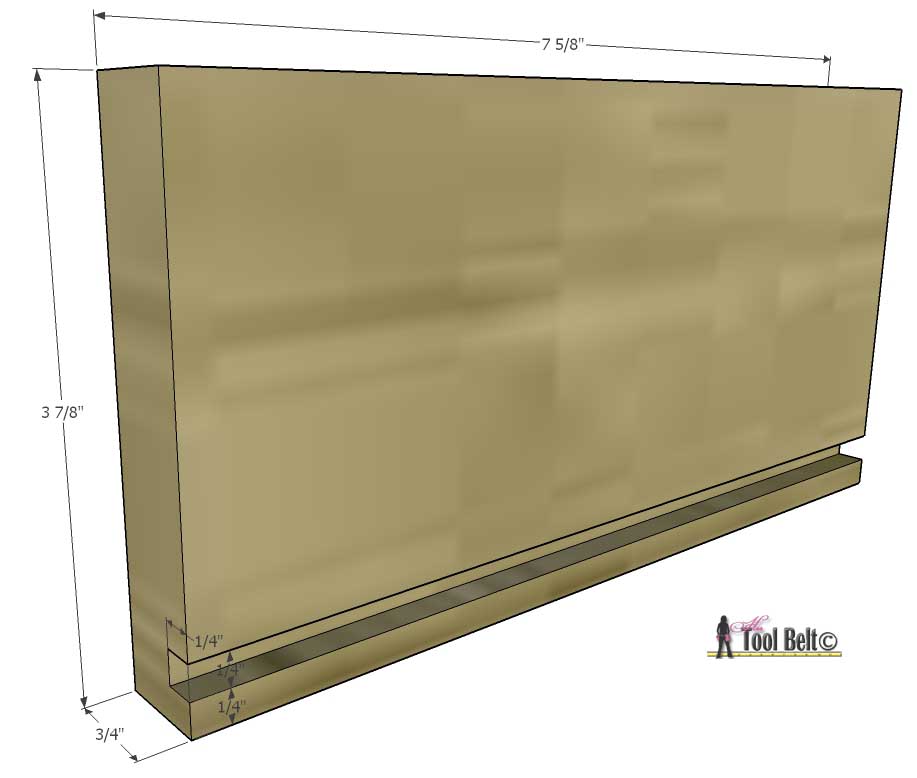
Grab the 4 sides of the drawers. Make dado cuts 1/4″ from the bottom, 1/4″ deep and 1/4″ wide.
 If you have a pocket hole jig , you can make pocket joints on each end of the drawer sides (outside) to attach the drawer together. If not, pre-drill holes through the drawer front and back.
Dry fit the drawer around the drawer bottom, check that it will fit in the drawer slot, trim as necessary. Use glue and 1 1/4″ screws to assemble the drawer together.
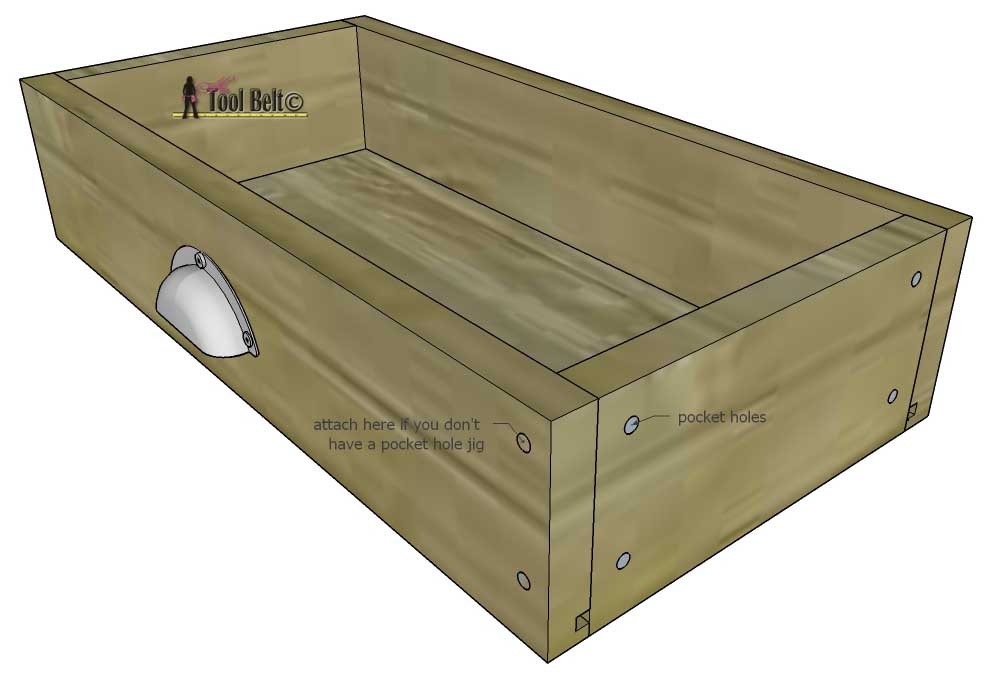
Attach a drawer pull to the front of the drawer. Sand the cordless drill station as needed.
To attach it to the wall, first locate studs in your wall. You’ll also probably want it accessible to a power outlet. Once you decide where to hang it, pre-drill holes in the back and attach it to the wall/studs with 3″ screws (2 minimum places).
Add a surge protector/power strip if desired and stock it full of your tools!


